Simple · Secure · Free forever
Self-host your homelab on the internet.
Selfie Proxy gives everything running at home — your NAS, your photo library, your Home Assistant dashboard — a friendly, secure address on the internet. Point one small server at your domain, connect your home network, and you're done.
Free and open source, forever. Runs on the cheapest VPS you can find.
One encrypted tunnel out. Everything else stays home.
The problem
Home internet was never built to be reached from outside.
Shared IP addresses. No port forwarding. An address that changes overnight. That's most residential internet today — and it's exactly why the thing you built at home stays stuck at home.
There are tools that solve this properly for a living: Cloudflare Tunnel, Tailscale, Pangolin, and others. They work well. They're also built for teams of network engineers, and most of what they offer is functionality a self-hoster will never touch.
Selfie Proxy is built for exactly one person: you, running your own stuff.
What you get
Everything a homelab needs. Nothing a homelab doesn't.
Six things, each solving a real problem you've probably already hit.
One simple admin portal
Every homelab and every exposed app, managed from a single page. A web form to fill in, not a config file to get right.
Authentication built in
The admin portal is protected out of the box, and a checkbox is all it takes to put the same login screen in front of any app you expose — even ones with no auth of their own.
Automatic certificates
Every app you add gets a real, auto-renewing HTTPS certificate the moment you save it. No certbot, no expired-cert surprises at 2am.
Add an app in seconds
Pick a subdomain, point it at your app's local address, save. nas.yourdomain.com is live before you've finished your coffee.
Any number of homelabs
Connect your house, a parents' house, a friend's server rack — manage every one of them from the same portal.
See what's online at a glance
A green dot means a homelab's tunnel is up right now. Red means it isn't. No SSH, no guessing which app went down.
See it in action
The whole admin portal, in four screens
Every screenshot below is the real thing — no mockups.
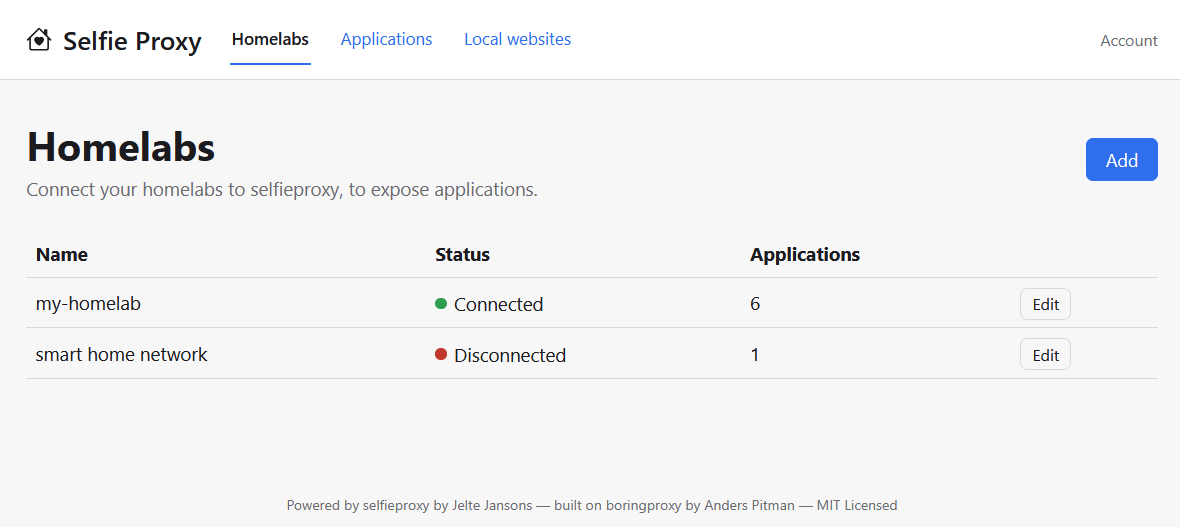
Homelabs
See every home network you've connected — and whether it's actually online
A green dot means the tunnel is up right now. A red one means it isn't. No guessing, no SSH-ing in to check.
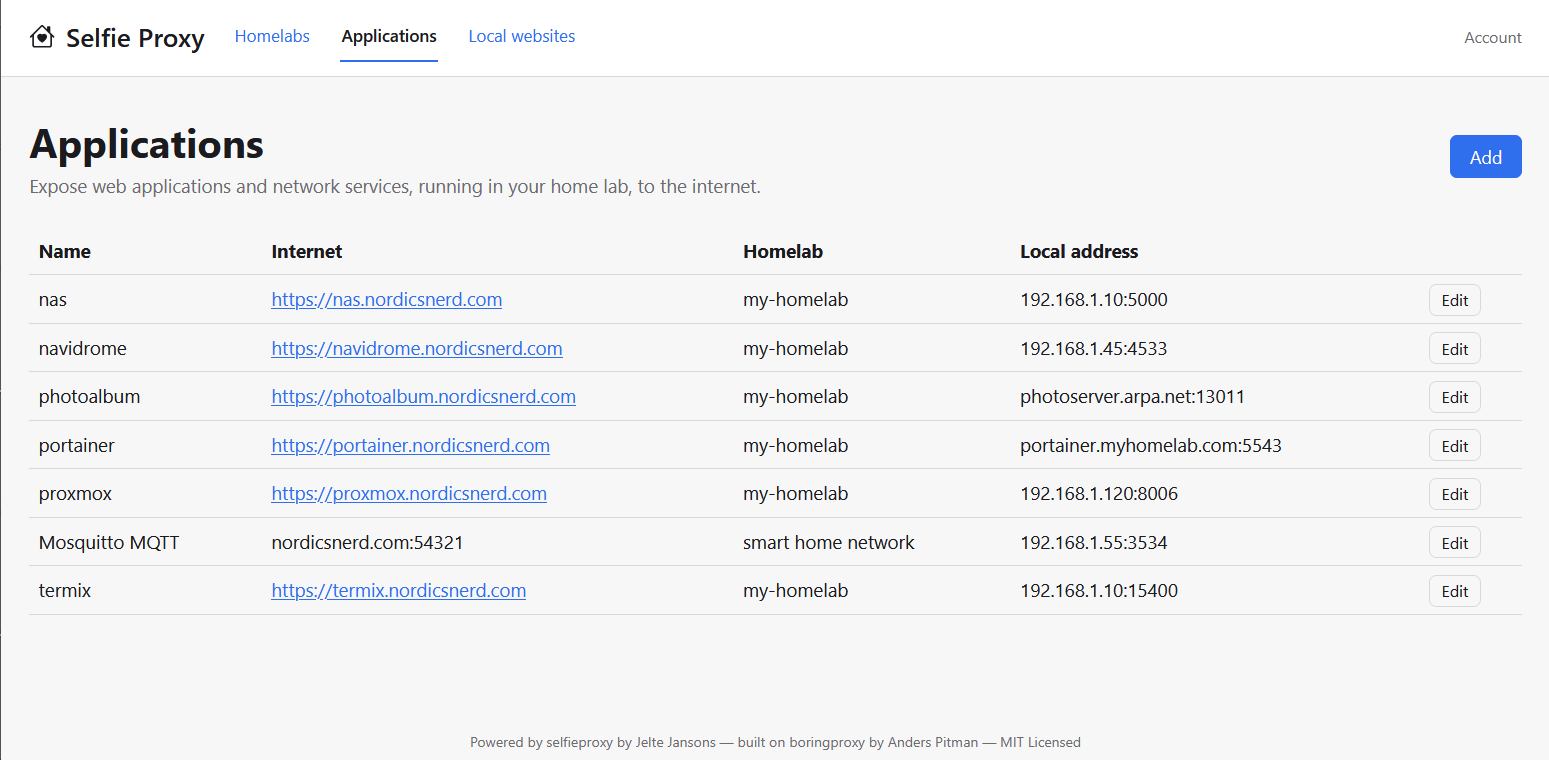
Applications
Every exposed app in one table
Its internet address, which homelab it lives on, and where to find it locally. Click through to a working https:// link straight from the list.
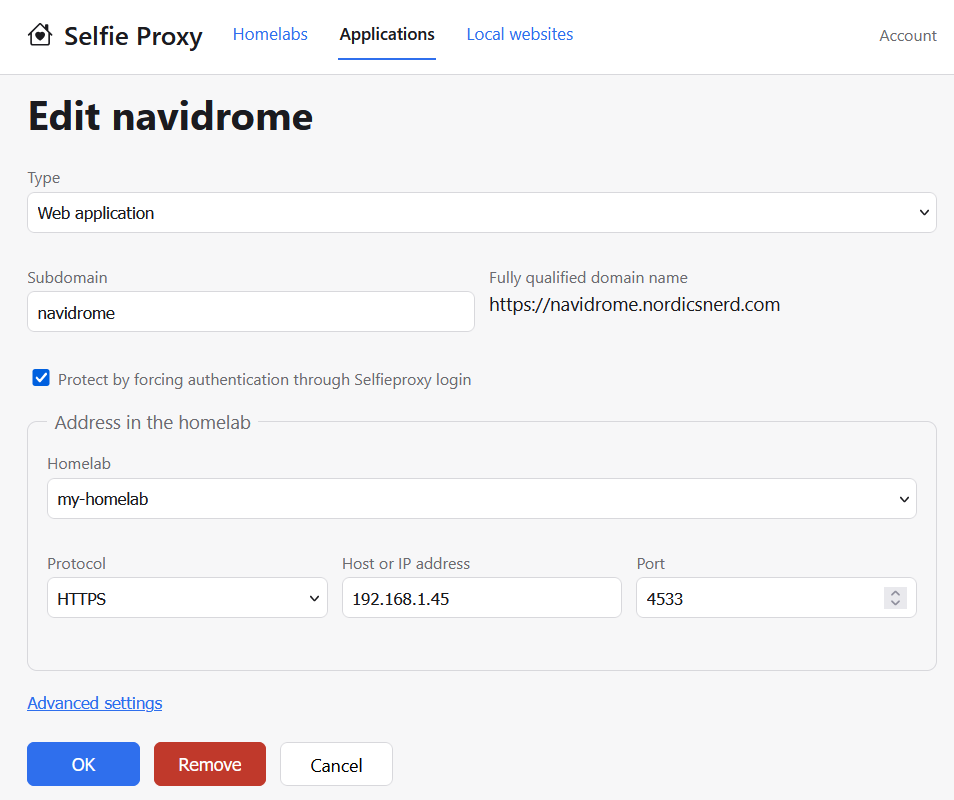
Edit application
Point it at an IP, pick HTTP or HTTPS, decide if it needs a login
That's the whole form. No YAML, no restarting a reverse proxy by hand to pick up the change.
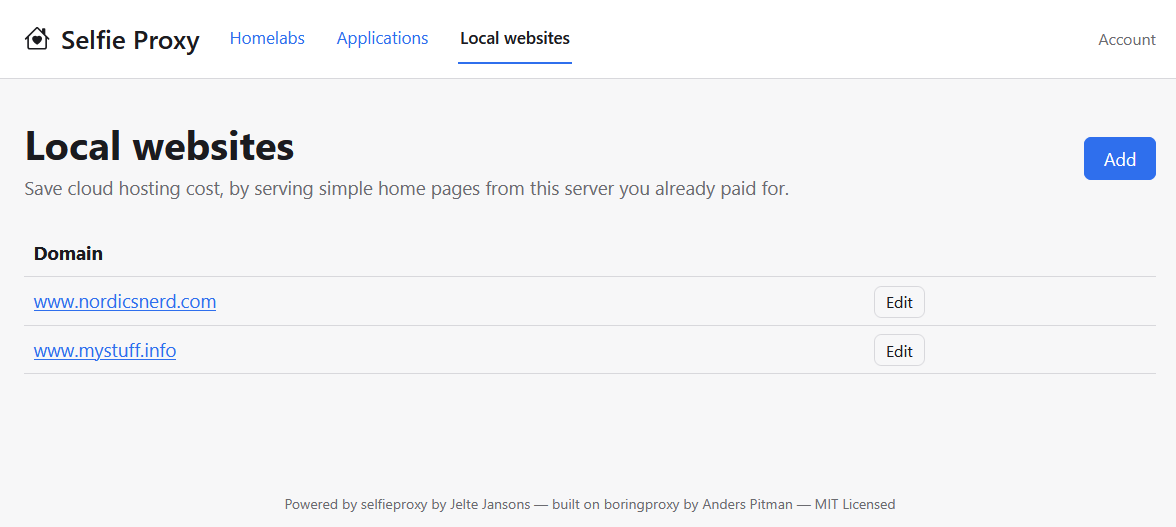
Local websites
Serve a plain static site under your own domain
A homepage, a resume, a small landing page — hosted straight from the server you already pay for, no separate hosting bill.
How it works
From zero to a public URL, in one afternoon
-
01
Point your domain at the server
Add an
Arecord for your domain and a wildcard*.yourdomain.com, both pointing at your server's IP. -
02
Download two files
docker-compose.yamland.env— that's the entire install package, both grabbed with a singlecurl. -
03
Fill in three values
Your domain, an admin username, and a one-time bootstrap password you'll be asked to change on first login.
-
04
Start it
docker compose -f docker-compose.yaml up -d. That's the install command. It's also the update command. -
05
Log in and connect your first homelab
Visit
selfieproxy.yourdomain.com, set your real password, and the portal walks you through the rest.
The parts list
What you actually need
What this isn't
Deliberately not for the enterprise
Selfie Proxy skips high availability, load balancing, role-based access, and managed SaaS offerings. Those things matter for business continuity — and they're notoriously easy to misconfigure. For a homelab, they're just bloat waiting to bite you. If you're running this for a company, use a properly supported commercial product instead.
- High availability / clustering
- Load balancing across replicas
- Multi-user roles & permissions
- Managed, hosted SaaS offering
Questions
Before you install it
Is this actually secure?
Yes. Traffic between your homelab and the server always travels through an encrypted tunnel, to a server that's entirely under your own control rather than a third party's. Every exposed app gets HTTPS automatically, and the admin portal — optionally any app — is protected by a built-in login screen. It's open source, so the code is there for anyone to check.
Is this free?
Yes. Selfie Proxy is free and open source under the MIT license, usable in any environment, hobby or professional, without limitations. That said, if your business depends on it, you're probably better served by a supported enterprise solution — see "What this isn't" above.
Does it run on macOS or Windows?
The server needs Linux — it relies on Docker's host networking, which macOS and Windows don't support. The homelab agent has no such restriction: it runs fine in Docker's default bridge mode on macOS and Windows too, with one limitation — no local DNS server support, so you'll enter an IP address rather than a hostname when setting it up.
I already run NGINX at home with a valid certificate — can Selfie Proxy just use that?
No. Point Selfie Proxy directly at the web application itself, over HTTP or HTTPS with a self-signed certificate — not at the NGINX reverse proxy in front of it. Connecting straight to the application is what lets Selfie Proxy manage certificates for you automatically and protect the app with its own login, neither of which is possible if it's only forwarding to another reverse proxy.
Your server. Your domain. Your rules.
No account to create, no vendor to trust with your traffic. Just your own small server, doing exactly one job.